Configure DNS and Dynamic DNS Settings With the GFiber App

Set Custom DNS Servers
By default, your GFiber router handles web routing automatically. If you prefer to route your traffic through a specific third-party provider (such as Cloudflare, OpenDNS, or custom parental control filters), you can specify up to 3 custom IPv4 DNS addresses.
Before you begin, download the GFiber App from the Google Play Store or the App Store.
-
Locate your settings: Open the GFiber App and select the Network tab from the bottom menu.
-
Navigate to DNS: Tap Network settings, then Advanced network settings, then DNS.
-
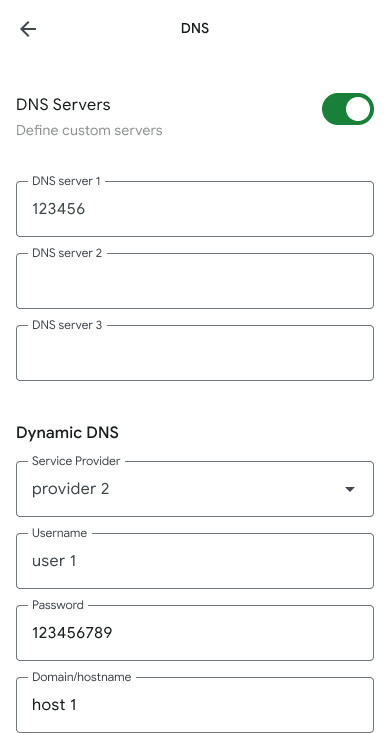
Toggle custom servers: Tap the DNS servers toggle switch to ON.
-
Input your server addresses: Enter up to 3 custom IPv4 DNS addresses into the fields provided in your preferred order of contact.
-
Save your changes: Tap Save to apply the configuration.
Set Up Dynamic DNS (DDNS)

changeip.com
domains.google.com
easydns.com
no-ip.com
zoneedit.com
The GFiber network assigns dynamic public IP addresses that change periodically. If you host a local service (such as an FTP or SSH server) and need to access it remotely using a consistent web domain name, you must use Dynamic DNS.
Before you begin, download the GFiber App from the Google Play Store or the App Store.
- Locate your settings: Open the GFiber App and select the Network tab from the bottom menu.
- Navigate to DNS: Tap Network settings, then Advanced network settings, then DNS.
- Choose your provider: Click the Service provider drop-down menu and select your third-party DDNS host.
-
Enter credentials: Input the exact Username and Password associated with your third-party DDNS account. (Click Show next to the password field if you need to verify your spelling).
-
Enter your domain: Type the registered Domain or Hostname for the service you want to host.
-
Save your changes: Click Apply to link your hardware.
-
To stop using the service later: Return to the Dynamic DNS section, change the Service selection to None, and click Apply.